Saturday, November 5, 2011

Pizza Nirvana?

Readers!

Yes, I know, it's been over two weeks, and I apologize. I've been out busy with midterms, sickness, an out of town weekend, and then another illness of which I'm currently recovering from. I wasn't sitting completely idle though! That out of town weekend was spent at my Dad and stepmothers country ranch in Healdsburg, with six people looking forward to dinner Sunday night. My dad suggested I make my "famous" homemade pizza, and after being stuck in my small college dorm kitchen, I jumped on the chance to make use of the nice Gabbro (opposite of granite fyi, Geology major checking in) countertops (there's also an island!).

So began my three part pizza post, with this first part consisting of the making of the pizza. Parts two and three with go over making a quick and easy marinara sauce and authentic pizza dough. I wouldn't call this recipe labor intensive, but making the entire pizza from scratch can be daunting if you are new in the kitchen, as it requires you to know how to properly bake the pizza, make the dough (I just finally nailed this down myself, took over 10 tries), mince, chop, season, and all that jazz. The way I look at it though is that this is a great way to practice your culinary skills in the kitchen, and also your creativity! Pizza is the ultimate blank slate. You can transform your dough into a classic marinara, make it a meat-lovers, or if your especially crazy even a taco pizza!

And without further ado...

It didn't last long at all...

Pizza Nirvana

Prep Time - 20-40 minutes
Cook Time - 20-25 minutes per pizza

Serves 2-4

Main Ingredients:
- Pizza Dough
- 1/2 Cup Pizza Sauce
- 8 Ounces of Mozzarella Cheese (I use low moisture-part skim. Some brands can be really bad, like Walmart's. I've found that Precious Cheese makes the best wallet friendly Moz) 
- Flour (King Arthur's Bread Flour is amazing)
- Basil Leaves (Dried or Fresh)
- Pinch of salt*
- 1/2 tsp pepper*
- 1/2 tsp oregano*
Optional Ingredients:
- Mushrooms
- Cooked Italian Sausage
- Bell Peppers
- Red Onion, White Onion
- Anything else your heart desires!

Start off by Preheating your oven to 450 degrees. 

Commercially, pizzas are normally cooked at 600 to 900 degrees, but since most people don't own a commercial oven, 450 is about the highest you'll get. There are some tips though that can help you to maximize your pizza cooking efficiency. Set the rack the pizza is going onto, on the second lowest slot, and only cook one pizza at a time. If you have a convection oven, turn it on as well. Also make sure to wait a good 10-15 minutes after the oven pre-heats to start cooking the pizza, as oven temperatures will fluctuate a surprising amount for about 10 minutes after the pre-heat. 

Take your raw dough ball and using a lot of flour work it out using your fingers until it's about nine inches wide. Pizza dough should be pretty elastic so it might take a few minutes. Pick it up once it is fairly large and you can either toss it to stretch it (not recommended unless experienced) or you can employ gravity to help you. To do this just hold the dough and let it fall down, rotating the dough so it evenly stretches. I can usually stretch my dough out to about a foot and a half circle, but don't ruin your dough in pursuit of a larger pie! Dust your pizza tray with cornmeal or flour and place out your dough. take a fork and poke holes all over the dough, especially the sides. This will stop bubbles from rising. Place dough in oven for 4-6 minutes, and take it out before it hits golden brown**. 

Cooked and waiting for toppings

Next prepare your other toppings. For this pizza we added Italian sausage, mushrooms, and red bell peppers on top. Use however much you want, but remember you never want to overburden a pizza!


 Courtesy of Pops

Pops in action...He's deadly with knife

Once all your toppings are ready, spread out your pizza dough. Unless you like a lot of sauce, keep the sauce very light, as sauce tends to go a lot further than anticipated in pizzas, you should still be able to see the dough underneath the sauce. Following that advice, spread out your cheese. It'll usually amount to about eight ounces for one pizza, but stop when the pizza is covered just enough so you see mostly cheese, but still a hint of the sauce underneath.

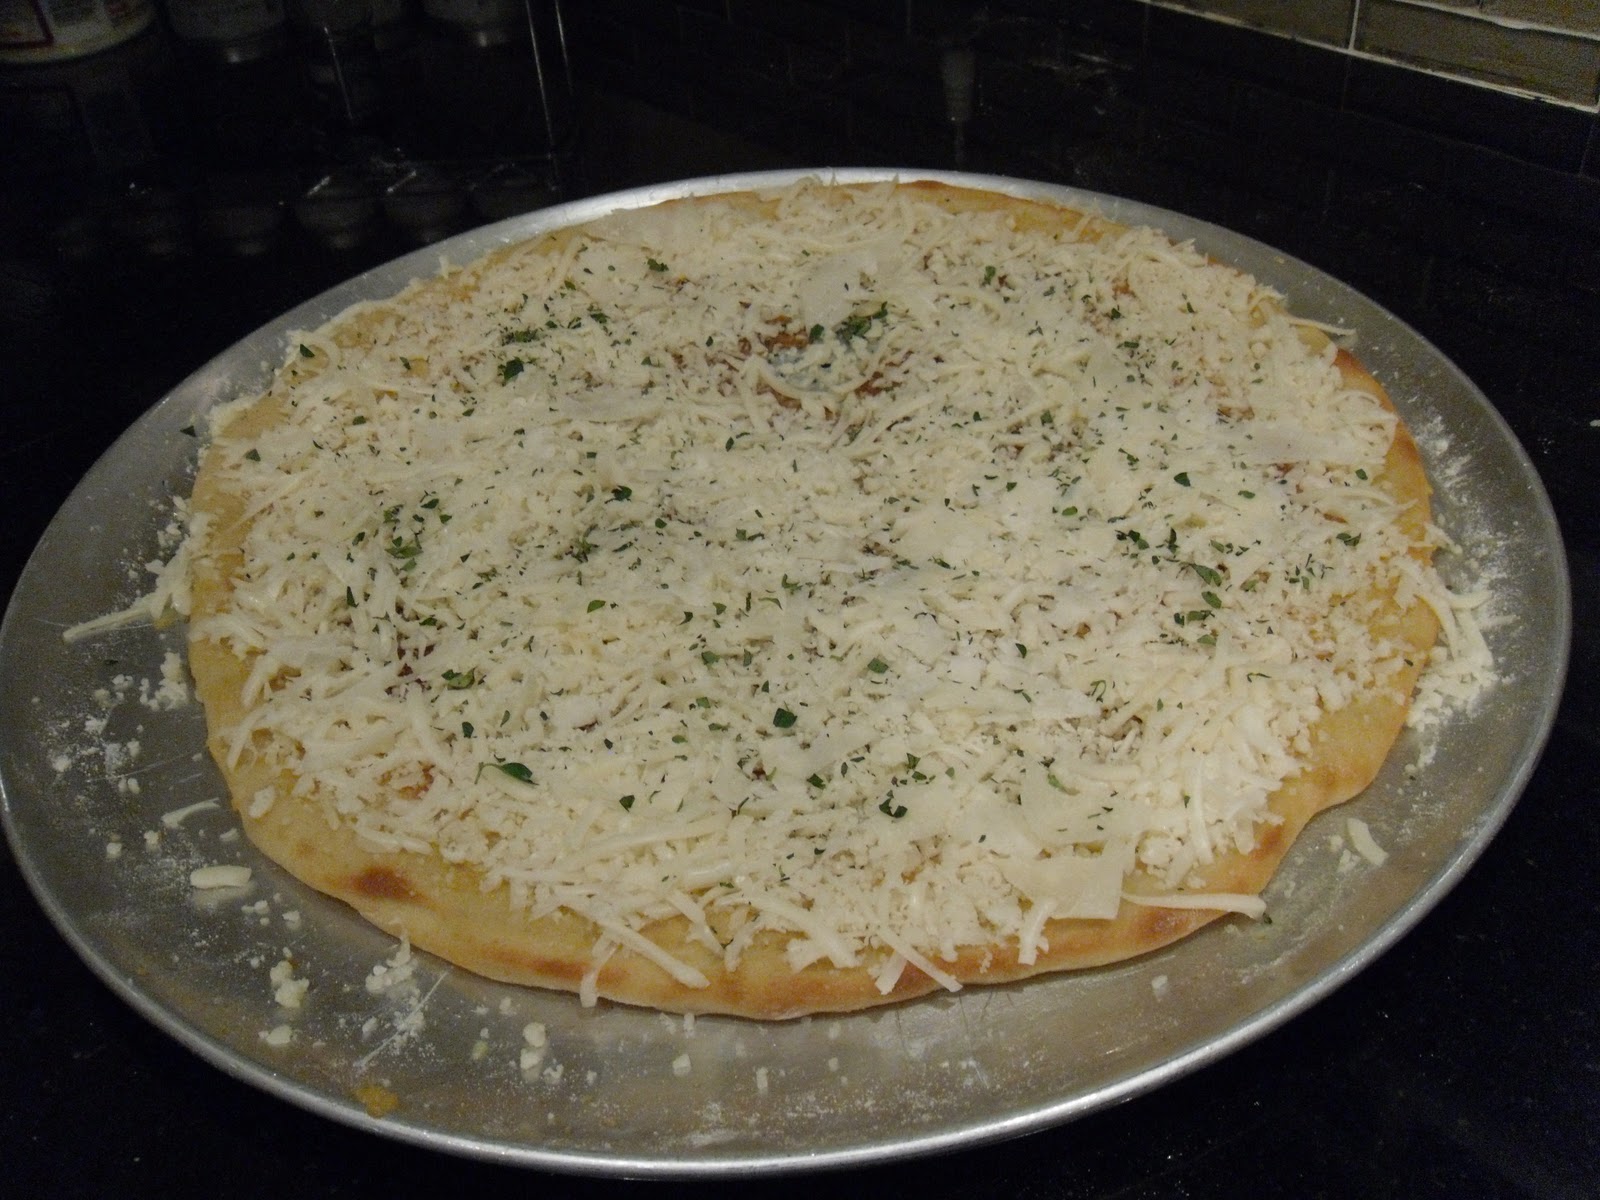
 Make sure to spread the sauce and cheese all the way to the edges!

Add your other toppings and season with your salt, pepper, and oregano. Your pizza is now oven ready!

Place you pizza in the oven and set the timer for about 15 minutes. Keep an eye out for bubbles, but since the crust has been semi pre-cooked, it shouldn't be a problem. After 15 minutes, rotate the pie 180 degrees*** and cook until golden brown, about 5-10 minutes. 

Here's the finished product!

We didn't have basil for this pizza, but if adding fresh basil chop it up and add it after it's done cooking, 20 minutes in the oven will burn basil pretty bad. 

That's all there is to it folks! Making pizza is a lot of fun, and you can even turn your leftover pizza dough into pesto breadsticks! (future posts on pesto coming!)

Photos were taken by my lovely sister as I worked in the kitchen, thanks sis! Stay tuned for future post this week and keep an eye out for the rest of the pizza series!

Stefan

* I put up rough amounts for the spices for those who are unsure of how much to add. Generally when it cooking it's just a lot easier to spice and season by eye (not for baking though). This is how I season my foods so if those amounts are off I apologize. 
** I pre-cook my pizza dough because in a home oven it can be tough for the crust to cook completely at the same time as the cheese and toppings. Also it helps to prevent a soggy crust and bubbles!
*** Again another shortcoming of commercial ovens. Most ovens cook whats in the back faster than the front, so rotation of the pizza will insure that everything cooks evenly.

Sunday, October 16, 2011

Green Beans and Honey, Blasphemy!

Fellow Readers,

As a kid I never liked honey, not because of the taste, but rather by how it is produced (if you don't know, don't ask). As I grew older, I realized that it doesn't matter how it is made, but how it tastes! I love honey now and try to use it in as many things as I can because it is so healthy, from peanut butter sandwiches to baked green beans! Wait, what? Green beans? That's right! I developed the honey green bean recipe on a whim, and it's really good, so here you go!


Honey Baked Green Beans


Prep time - 20 minutes
Cook time - 15 - 20 minutes

Serves 4 (as a side dish)

Main Ingredients:
- 1/2 pound of green beans
- Olive oil
- 3 tbsp's of honey
- Parmesan cheese
- 1/4 tsp salt
- 1/2 tsp pepper
Optional Ingredients:
- 1/4 cup Breadcrumbs

Preheat oven to 375 degrees. Prepare green beans by washing and cutting off the ends. When done, steam al dente (cooked yet still firm). Once steamed, throw green beans into a large bowl and add olive oil to coat, mixing until thoroughly coated. Add some parmesan cheese, honey, salt, and pepper and mix again, making sure all the beans are well coated. Spray down a small glass bread dish with cooking spray and add green beans. Top with breadcrumbs and bake in oven for 15-20 minutes. Remove when finished, serve and enjoy!

The finished, delicious product

These green beans are great to round out a meal filled with savory, thick dishes like mashed potatoes and turkey. The honey really comes through and will refresh your palate for your next bite. 

Enjoy and stayed tuned next week for future posts!

Stefan

Wednesday, October 12, 2011

Understanding Chilies, The Scoville Heat Scale

Fellow Readers,

Today's post isn't a recipe, but rather a crash course on what makes chili peppers' spiciness range from a slight tingle to "rush for the milk".

I first learned about peppers at a friends birthday party. We were all loafing around his house, and as I walked through the kitchen, I noticed this tiny pepper bush which contained a whole bunch of miniature chili's ranging in size from my pinky fingernail to the size of a quarter. Naturally, I asked the host (the birthday boy), what type of chilies those were, and he replied that he was pretty sure they were fake or harmless. At this point a long discussion with a group of people went into deciding if they were real or fake. Having all the confidence of youth, I boldly announced I would settle this matter once and for all, grabbing the reddest pepper and popping it in my mouth. I chewed for about 10 seconds until I hit a wave of unbelievable spiciness. This thing was hot, I mean really HOT! Sweat beads broke out across my forehead as I rushed for the fridge, grabbing their one gallon jug of milk, and promptly drinking almost half of it. It didn't help much, and it took almost an hour for the heat to dissipate. More happened, but i'll end the story there.

Tabasco peppers - The party culprit

After the pepper incident, I did a lot of research on chili's, and upon eating a spicy dish a few days later, found out my spice tolerance had risen drastically.  I'll share some helpful tips when it comes to chili's, but first some background.

Other foods like wasabi and horseradish are also spicy, but chilies lend their spiciness to the chemical Capsaicin.  Capsaicin, actually a group a similar organic compounds, is an alcohol soluble compound (remember this) that registers as pain when it comes into contact with mucous membranes (mouth, nasal passage, esophageal lining, etc). This pain is due to the fact that capsaicin is interpreted by nerve cells as heat.

Sweet bell peppers, completely harmless...

I won't give you the history, but the Scoville scale was developed as a way to measure the spiciness of chili peppers back in the early 1900's, and is still in use today. The Sweet bell peppers above rate a 0 on the Scoville heat scale, Jalapenos range from 2,500 to 9,000, and pure capsaicin is 15,000,000 to 16,000,000. A great website with the history and list can be found here, Scoville Heat Scale, but here are the most common peppers.

Sweet bell peppers - 0
Jalapeno - 2,500 - 9000
Chipotle - 5,000 - 8,000
Hot Wax - 5,000 - 9,000
Tabasco - 30,000 - 50,000
Cayenne - 30,000 - 50,000
Thai - 50,000 - 100,000
Orange Habanero - 150,000- 325,000
Naga Jolokia (Ghost Pepper) - 800,000 - 1,041,000
Pepper Spray - 2,000,000 - 3,000,000
Pure Capsaicin - 15,000,000 - 16,000,000

As you can see, many of the peppers most people consider hot, are relatively mild when compared to the Ghost pepper (one of the hottest peppers in the world), which can actually cause damage to the mouth and esophagus. 

NOT for seasoning food

Time for some pepper tips/tricks. Capsaicin, as mentioned earlier, is alcohol soluble and likes to bind to fat, so If you find yourself in a precarious pepper predicament, don't reach for the water, or even the milk. Water will spread the capsaicin around, and milk works (skim doesn't) but not that well (in my experience). To relieve the heat, swish around a shot of hard liquor, like vodka, and then spit out. I've tried this out and it works surprisingly well.

When preparing chilies for your meals, wear gloves, as capsaicin will linger on your hands, not fun later if you have contact lenses. 

To lessen the heat of a chili, remove the seed pod and ribbing of the pepper, as this is where the highest concentrations of capsaicin lie in the chili. To spread out the heat of chili more, mince instead of dicing it, causing the capsaicin to be more evenly infused into your dish.

The ribbing and seed pod here are fairly connected, it's the lighter green part of the chili.

To further lessen the heat of a chili, let it ripen. Much against popular conception, the greener the chili pepper is, the hotter it is. The dark red chilies are actually less potent than their unripened brethren. And finally, after chili preparation, always wash down your cutting board! You don't want your hot stir fry to contaminate and ruin your next meal.

And that's all I have for you today! If I learn anything new, I'll make sure revise this article. 

Do you have any chili pepper tips/tricks? If so, I want to know, so please post in the comments! 

Stefan

* I take no responsibility for anything that happens as a result of you reading this article. This articles sole purpose is to educate and advise on proper chili preparation.

Monday, October 10, 2011

McLovin McMuffin's

Hello Readers!

Today's post goes great with my last post, Bacon To Perfection! as it uses bacon as one of the main ingredients. Drum roll please...... introducing Egg McMuffins! This breakfast staple was introduced nationwide in 1972 by McDonald's (thanks Wikipedia!), and was introduced to me a couple of years ago. I never really have breakfast at fast-food places, so my first McMuffin experience was through my old hotel/restaurant job, bussing the morning shift. One of the chefs made these morning sandwiches after a crazy Sunday (summer in wine country) and I've loved them ever since!

Usually McMuffins are made with Canadian bacon, but I prefer real bacon as it is more common to have by chance in the kitchen, it's cheaper, and delicious! The classic round shape of the egg is created through cooking said egg in a ring, more on this later.

Om nom nom nom nom...nom

Here's the recipe!

Egg McMuffins

Prep Time - 5 minutes
Cook Time- 10-20 minutes

Serves 2

Main Ingredients:
- Two Slices of Bacon (or four halves)
- Two English Muffins (I use Oroweat Whole Wheat, so good!)
- Two Slices of Cheese of Choice
- Two Large Eggs
- Medium Sized Cooking Ring or Foil Ring
Optional Ingredients:
- Avocado
- Hollandaise Sauce
- Butter
- Tabasco Sauce
- Anything Else, Be Creative!

Preheat oven to 375 degrees. Split English muffins and toast to desired level. In the meantime, start cooking bacon (Bacon To Perfection!), and grease your cooking ring.

If you don't have cooking rings, take a piece of foil about 5 inches in width and fold lengthwise about 3/4 of an inch in, repeating this to the top. Take one end and fold in the corners, forming a tall triangle. Insert the folded end into the other end and there you go, a cooking ring!

Can you see me in the reflection?

Turn element onto medium. Place cooking ring on Teflon pan and crack egg into it. Hold down the ring lightly so the egg doesn't all leak out the side. Once egg has cooked for 30-45 seconds and is no longer leaking, poke yolk with a fork* and throw a hood on top for quicker cooking. Once egg is mostly cooked on the bottom, remove ring and flip, cooking the other side.

Finished egg

Once the bacon and eggs are cooked, place cheese, bacon, egg, and any optional ingredients into the English muffins. Cook for 6-8 minutes in the oven. Serve and enjoy!

To make more McMuffins just scale the recipe up, fairly straightforward conversion, and don't tell McDonald's about this!

Anything you like to add to your McMuffins? Tell me in the comments!

Stefan

* I don't recommend whisking the egg before cooking in the ring because if this is done, it leaks from the bottom of the ring much more than it normally does.

Saturday, October 8, 2011

Bacon to Perfection!

Readers!

Today's post is on something so delicious, satisfying, and sinful that it is something most people try to resist, but can't. It's Bacon! Loaded with fat and so good it's hard not to have only one slice, bacon is the bane of anyone trying to lose weight or eat healthier. Don't worry though, everything can be had in moderation, even bacon*!

So, your reading this and you decide to yourself, "Yeah, everything in moderation...I'm going to have some bacon tomorrow morning!" That's great, and that's why I'm here to guide you. This post will give you the knowledge to cook bacon to perfection because if you are going to indulge in some bacon, lets make it the best bacon you've ever had.

While bacon is fairly easy to cook, it can be cooked incorrectly. Bacon is ruined primarily in three different ways. First is the microwave. I've never had bacon that tasted good after being cooked in the microwave, and I never will. Second is the overcook. Bacon that's been overcooked is hard, brittle, and so dry it's tasteless. Third is the undercook. Bacon that hasn't been cooked long enough tastes good, but is so chewy and tough that it is a pain to eat.

Let's Begin!

Bacon Perfection

Prep time - 0-5 minutes
Cook time - 5-10 minutes

Main Ingredients:
- Bacon (Pepper bacon is my favorite, try it!)
- Paper Towels
Optional Ingredients:
- Pepper to season

If your bacon is frozen, thaw in microwave for one minute on power 1-2, just enough to peel it apart. Sometimes on the side of bacon is huge hunks of fat with no meat, I trim this off as it's unnecessary and will just curl up when cooking. I also cut my bacon in half so it's easier to cook, and more will fit in a pan. Once prepped, place bacon in a Teflon pan and turn heat to medium-low.

Uncooked pepper bacon

Watch the bacon, but for the first 2-3 minutes it shouldn't require much attention. Once you hear it start to sizzle, flip to the other side. Your bacon should look like the picture below once it is halfway cooked.

So Close...

Keep flipping at your discretion to keep sides evenly cooked, and slightly after this point you should notice a lot of grease pooling in the pan. Secure bacon and dump the grease into a grease can (the proper way) or down the drain (the not so proper way, run hot water). This step is the secret to perfect pan-cooked bacon as the grease, if left in the pan, the grease flash cooks the bacon till it's super crispy and brittle.  Use the paper towel to wipe grease from side of pan, we don't want any grease fires! Return bacon and pan to the burner and cook until done, which should look like so.

It's that easy!
Serve and enjoy!

On a side note, a few of you might be thinking, "But Stefan, you forgot to mention cooking bacon in the oven!".  It's true, bacon can be cooked in the oven, and generally it's the superior method, as it is harder to screw up, the grease drains itself, and you can cook more at once, but there is one catch! The reason I choose the pan method is because it is so much quicker to cook bacon this way, and when you have class in 20 minutes, the oven isn't an option. Hmm, maybe I'll cover oven cooked bacon in the future.

Thanks for reading, and if you have your own method to cook perfect bacon, please leave it in the comments!

Stefan

* Bacon contains a lot of saturated fats, but saturated fats are in fact required by the body for your everyday diet (to the disagreement of popular diet fads). Eat bacon, get your saturated fats, be happy!

Wednesday, October 5, 2011

Mac & Cheese, Round 1!

Hello Readers,

Last night I was trying to decide what to do for my next entry into CollegeMealIdeas, when a sudden craving for mac and cheese hit me. Loosing all sense of reality, I ran to Safeway in a self-induced, cheese deprived state and bought a 32 ounce block of sharp cheddar (22.1 cents an ounce!), enough elbow noodles to feed a 3rd grade class, and some box mac and cheese to top it all off. Arriving home, I realized that I can't do this every time I have a food urge (I'll go broke), but with my new cheese surplus, might as well make enough mac and cheese for my roommates and I to indulge in.

The image that was flitting through my mind last night, courtesy of Google images

This is a simple recipe, though not as simple as my jazzed up box mac and cheese (future post coming), that is great for making large quantities of cheesy, delectable noodles. Be warned though, making this and leaving your apartment door open is a sure way to meet your dorm neighbors (good or bad?). Enough talk though, here is the recipe!

Mac and Cheese with Sage

Prep time - 15-30 minutes
Cook time - 15 minutes

Serves 4-6

Main Ingredients:
- 1 lb elbow noodles (box)
- 1 3/4 cups shredded cheddar cheese
- 1 1/4 cups milk (I use 1%, but skim to whole milk works. Whole milk will taste the best)
- 1/4 cup white flour (bread or all-purpose)
- 3-4 cloves of crushed garlic
- 1/2 stick unsalted butter
- 3/4 tsp salt
- 1 tsp pepper
Optional Ingredients:
- 1 1/2 tsp sage (less if ground sage)*
- 1/4 cup breadcrumbs (future post on how to make breadcrumbs here)

Note - Regarding the sauce, for those savvy in the kitchen, you're basically making a simple white sauce, which cheese is then added to.

Set oven to 375 degrees. Boil noodles, cook al dente (more on this in the future), and drain once done. While noodles are boiling, in a separate sauce pan (with high sides, Teflon not recommended**), melt your butter on medium heat. Once butter is heated, add your crushed garlic and stir until slightly golden brown. Incorporate half the flour into the butter-garlic sauce, and then add the rest.

At this point, many recipes ask you to cook the butter flour mixture for a few minutes to lessen the flour taste, but if using good flour, you'll actually remove the nice nutty flavor flour has.

Finished cheese sauce - It steamed up the camera lens!

Immediately add your milk, and using a whisk stir often until sauce begins to thicken (4-6 minutes). Once thickened, start mixing in your cheese, about 1/2 a cup at a time. Leave 1/4 cup on the side for later. Add your salt, pepper, and I always add sage (it's the secret ingredient!). Sauce will now be nice and thick, so take it off the heat, and in a large pot mix the noodles with the sauce.

Must...resist

Spread your mac and cheese into a well greased casserole dish, top with the rest of the cheese, and sprinkle bread crumbs on top. Place in oven, and try patiently waiting 15 minutes as it cooks to perfection!

Finished product - Not pulled from Google images!


One more for good measure

This recipe is killer, if I haven't made it apparent yet, and it will easily fill four starving college students, so make it with friends!

Enjoy your new found ability to induce food comas to those around you at will, takes just 35 minutes!

Until next time, and stay tuned in the next couple of days for a ripoff of a breakfast classic!

Stefan

* In my opinion adding the sage is required. It just blends and tastes great with the fatty favor and texture of mac and cheese. 
** Teflon is not recommended because when metal comes in contact with it, like a whisk, microscopic amounts will flake off into your food, over time destroying the non-stick coating

Monday, October 3, 2011

Lets Salsa!

Hello Readers!

You're reading my first real post/recipe on my blog "CollegeMealIdeas"! I'll be trying to update the blog from this point on at least twice a week, hopefully 3-4 times a week. I'll be covering everything from the basics, (like classic grilled cheese!) to more advanced recipes, kitchen tips/tricks and reader recommendations. Can't wait till I get to my sweet and spicy rib recipe!

This brings me to my first recipe, Salsa! It's spicy, and with fresh tomatoes (especially cherry) it can be sweet too.  Salsa is great because it is healthy, delicious, and requires no cooking. There are  multiple ways to make salsa, but generally the less ingredients the better, which is why this recipe only requires five main ingredients (excluding salt & pepper). And without further ado...


Fresh-Cut Salsa

Prep time - 15 minutes
Cook time - 0 minutes

Main Ingredients:
- 4-5 medium sized tomatoes
- 3-4 cloves of garlic (crushed)
- 1 tbsp chopped cilantro
- 1 tbsp Lemon juice
- 1/3 cup diced onions (red and/or yellow)
- 1/4 tsp salt
- 1/2 tsp pepper

Optional Ingredients:
- Chopped chili's (for a mild salsa use jalapenos, or use habaneros for something hot!)
- Tabasco sauce
- Oregano

Add all ingredients to a mixing bowl as they are finished being prepped. Dice tomatoes and using hands drain excess water off of them before putting into a mixing bowl. Peel garlic (use the flat of the blade to easily remove skin) and crush in garlic press (or mince with knife). Next take half a lemon and squeeze the juice into the bowl, making sure to strain out the seeds. Follow this by mincing the cilantro (if it's fresh) and add it to the salsa. Take your onion, dice well. Add salt and pepper and stir!

Yum!

If adding a chili, make sure to wear gloves if you wear contacts and to wash the cutting board afterwards. Start by cutting the chili in half, removing the seed pod and using your knife at a 90 degree angle, remove the discolored spines on the inside. Dice from this stage. For additional information on chili's,  visit my post on chili preparation and the Scoville heat scale here Understanding Chili's, The Scoville Heat Scale.

Pictured - Inferno peppers, medium heat

And there you go! Basically just prep and mix into a bowl, and make sure to have chips on hand, because it's hard to resist freshly made salsa. Whether it's served at a party or on a burrito, this salsa won't disappoint!

Stefan